The Secret to Super Crispy Onion Rings: Freeze for Perfection
There's something uniquely satisfying about a perfectly crispy onion ring. That harmonious blend of sweet, tender onion encased in a golden, crunchy batter is an indulgence many of us crave, often leading us to seek out our favorite restaurant versions. But what if we told you that achieving those elusive, restaurant-quality onion rings right in your own kitchen is not just possible, but surprisingly simple, thanks to one ingenious trick? Forget soggy imitations or crumbly coatings – this comprehensive onion rings recipe is your definitive guide to homemade perfection, and it all hinges on a few minutes in the freezer.Why Homemade Onion Rings Reign Supreme (and the Challenge They Present)
The allure of homemade onion rings lies in their unparalleled freshness. Hot from the fryer, glistening with a perfect golden hue, they offer a sensory experience that pre-packaged or even many takeout options simply can't match. You control the quality of the ingredients, the seasoning, and the crucial frying process, ensuring every bite delivers that ideal balance of a tender, slightly sweet onion interior and an aggressively crisp, savory exterior. However, many home cooks shy away from making onion rings from scratch, often intimidated by the prospect of deep frying or frustrated by previous attempts that resulted in batter slipping off or rings turning out greasy and limp. The quest for that truly spectacular crunch, the kind that snaps with every bite, can seem like a culinary Everest. We've all been there: a promising start, only for the batter to deflate, leaving behind a greasy, disappointing mess. But with the right techniques, and a secret shared by restaurant professionals, you can overcome these common hurdles and truly master this beloved side dish. This isn't just about frying; it's about understanding the science behind the crunch to create crispy onion rings better than any restaurant you've tried.The Secret Weapon: Why Freezing is a Game-Changer for Your Onion Rings Recipe
This is where the magic happens, the definitive secret weapon in your arsenal for creating consistently perfect onion rings: the freezer. It might sound unconventional, but a brief stint in the freezer after coating is the absolute key to preventing your batter from sliding off in the hot oil and ensuring an unparalleled crispness. The reference context alludes to this crucial step, stating it helps "set the coating" and "keep the batter on the onion rings while they are being fried." Let's delve deeper into *why* this works so effectively: 1. Superior Adhesion: When you coat your fresh onion slices in a wet batter followed by a dry flour mixture, the batter is still quite pliable. Introducing these rings to hot oil immediately can cause the wet batter to liquefy and separate from the onion's smooth surface. Freezing them for 15-20 minutes solidifies the batter. It essentially "locks" the coating onto the onion, creating a firm, cohesive shell that is far less likely to detach or crack under the thermal shock of deep frying. 2. Enhanced Crispness: The extreme temperature difference between the frozen coating and the hot oil creates a powerful thermal reaction. As the cold batter hits the high heat, the moisture on its surface rapidly converts to steam, which then forcefully pushes outwards, creating tiny pockets and a wonderfully airy, crunchy texture. This rapid expansion and setting of the batter contribute significantly to that coveted shatteringly crisp bite. Think of it like a quick-setting concrete for your onion rings – it ensures the structure holds firm and develops optimal texture. 3. Minimized Grease Absorption: A well-set, crispy crust acts as a barrier, reducing the amount of oil that can penetrate the onion ring during frying. This results in a lighter, less greasy product, allowing the natural sweetness of the onion and the savory notes of the batter to shine through. This simple yet profound step elevates your homemade onion rings from good to truly extraordinary, ensuring you achieve a foolproof crispy onion rings recipe every single time.Mastering the Crispy Onion Rings Recipe: A Step-by-Step Guide
Ready to put this secret to the test? Here’s a detailed, step-by-step guide to making the most incredible, super crispy onion rings right in your own kitchen.Ingredients You'll Need:
- 1-2 large sweet onions (such as Vidalia or Walla Walla)
- 1 cup all-purpose flour, plus extra for initial dusting
- ½ cup milk (whole milk recommended)
- 1 tablespoon white vinegar
- 1 large egg
- 1 teaspoon seasoned salt (or more, to taste)
- ½ teaspoon garlic powder
- ¼ teaspoon black pepper
- Vegetable oil or other neutral frying oil (e.g., canola, peanut) for deep frying
Step-by-Step Instructions:
- Prepare Your Onions:
- Trim the top and bottom ends off your onions and carefully remove the papery skin.
- Slice the onions crosswise into ¼-inch thick rings. For larger, more uniform rings, opt for a larger onion.
- Gently separate the individual rings. Don't worry if some smaller inner rings break; they'll still fry up deliciously.
- Create the "Buttermilk" & Egg Wash:
- In a medium bowl, combine the milk and vinegar. Stir gently and let it sit for 5 minutes. The acid in the vinegar will curdle the milk slightly, creating a makeshift buttermilk that adds tenderness and helps the batter adhere.
- Whisk in the large egg until well combined. This is your wet batter mixture.
- Prepare the Seasoned Flour:
- In a shallow dish (a pie plate works well), combine the 1 cup all-purpose flour, seasoned salt, garlic powder, and black pepper. Whisk thoroughly to ensure the seasonings are evenly distributed. This is your dry coating.
- The Double Dredge – For Maximum Crunch:
- First Flour Coat: Take your separated onion rings and lightly dust them with plain all-purpose flour. Shake off any excess. This initial dry coating provides a rough surface for the wet batter to cling to, vastly improving adhesion.
- Wet Coat: Dip the flour-dusted onion rings into the milk-egg mixture, ensuring they are fully coated. Let any excess liquid drip off briefly.
- Second Flour Coat: Immediately transfer the wet onion rings back into the seasoned flour mixture. Press gently to ensure they are thoroughly coated on all sides. Shake off any excess flour.
- Place the coated onion rings on a baking sheet or plate lined with parchment paper. Ensure they are in a single layer and not touching. Repeat this process until all your onion rings are perfectly coated.
- The Critical Freezing Step:
- Once all your onion rings are coated and laid out, transfer the baking sheet to the freezer for 15-20 minutes. Do not skip this step! This is the secret to their crispness and preventing batter separation during frying.
- Preheat Your Frying Oil:
- While the onion rings are chilling, pour about 1 inch of vegetable or neutral frying oil into a deep skillet, Dutch oven, or deep fryer.
- Heat the oil over medium to medium-high heat until it reaches a consistent 350°F (175°C). Use a deep-fry thermometer for accuracy. Maintaining the correct oil temperature is crucial for crispy, non-greasy results.
- Fry to Golden Perfection:
- Carefully remove the onion rings from the freezer.
- Working in small batches (do not overcrowd the pan, as this will drop the oil temperature and lead to soggy rings), gently lower the frozen onion rings into the hot oil.
- Fry for 1-2 minutes per side, or until they are beautifully golden brown and incredibly crispy.
- Using a slotted spoon or spider, remove the fried onion rings and immediately transfer them to a plate lined with paper towels to drain any excess oil.
- Season with a pinch of extra salt immediately after removing them from the oil.
- Serve Immediately:
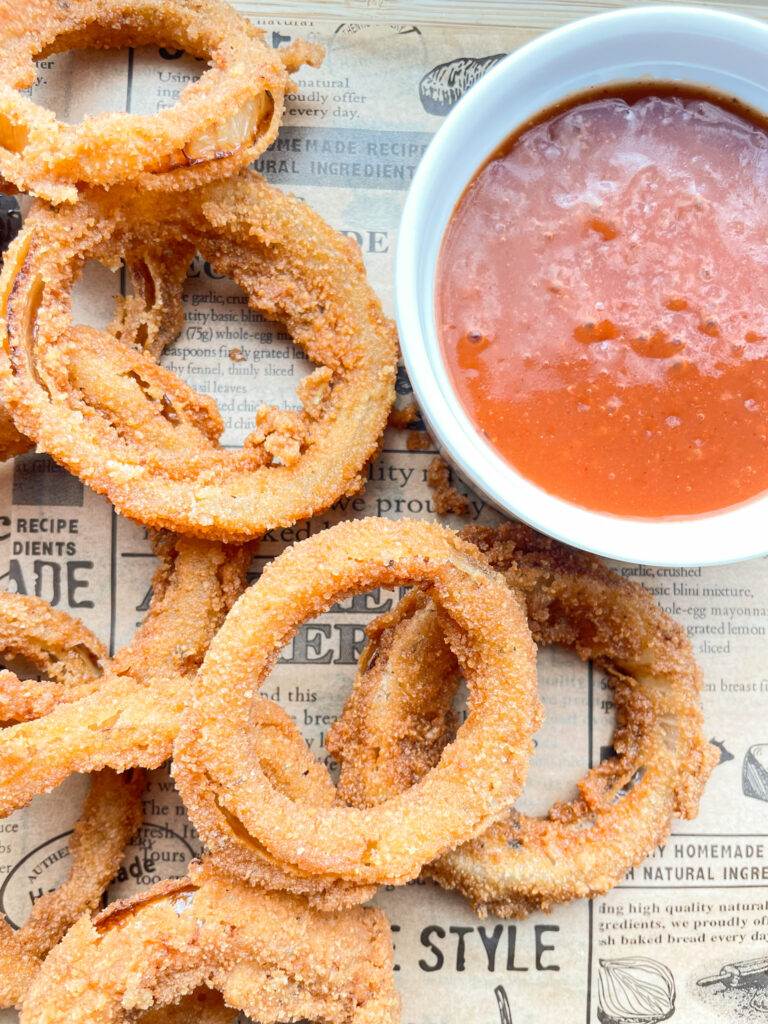
- Hot, fresh, and crispy onion rings are best enjoyed right away! Serve them as a side with burgers, sandwiches, or as a delightful appetizer with your favorite dipping sauces. This recipe yields enough for 4 people as a generous side dish.
Essential Tips for Onion Ring Perfection
Beyond the core onion rings recipe, a few additional tips can elevate your frying game and guarantee consistent success:
- Onion Choice Matters: While any onion can technically be fried, sweet varieties like Vidalia, Walla Walla, or even Spanish onions yield the best flavor profile, offering a pleasant mildness that contrasts beautifully with the savory batter.
- Oil Temperature is King: Invest in a good deep-fry thermometer. If the oil is too cool, your onion rings will be greasy. Too hot, and the exterior will burn before the onion cooks through. Aim for a consistent 350°F (175°C).
- Don't Overcrowd the Pan: Frying in small batches is non-negotiable. Overcrowding drops the oil temperature, leading to soft, greasy onion rings rather than perfectly crisp ones. Patience here is a virtue.
- Proper Draining: Always place fried items on a wire rack set over a baking sheet or on paper towel-lined plates to allow excess oil to drain. This prevents sogginess.
- Seasoning Boost: Don't be shy with seasoning the flour mixture. Beyond salt, garlic powder, and pepper, consider a pinch of paprika for color and mild flavor, or a touch of cayenne for a subtle kick.
- Dipping Sauces: While fantastic on their own, onion rings are even better with a complementary dip. Classic ketchup, a tangy remoulade, homemade aioli, or even a spicy ranch dressing are all excellent choices.
- Make-Ahead (Pre-Frying): For convenience, you can coat and freeze the onion rings for longer than 20 minutes – even up to a few weeks! Lay them in a single layer on a parchment-lined baking sheet until solid, then transfer to a freezer-safe bag or container. Fry directly from frozen, adding a minute or two to the cooking time if necessary. This makes them an incredible quick treat anytime.
Conclusion
The quest for the perfect crispy onion ring ends here. By understanding and implementing the simple yet profound freezing step, you unlock a culinary secret that ensures every batch of your homemade onion rings will emerge from the fryer with a shatteringly crisp coating and a perfectly tender, sweet interior. This isn't just an onion rings recipe; it's a testament to how small, strategic steps can elevate everyday dishes to extraordinary heights. So, gather your ingredients, embrace the freezer, and prepare to delight your taste buds with onion rings that are truly better than any restaurant's.
