There's something uniquely satisfying about a perfectly crispy onion ring. That harmonious blend of sweet, tender onion encased in a golden, crunchy batter, seasoned to perfection, often feels like a treat reserved for your favorite diner or fast-food joint. But what if we told you that achieving foolproof crispy onion rings at home isn't just possible, but surprisingly straightforward? With our comprehensive onion rings recipe, you're about to unlock the secrets to creating homemade onion rings that don't just rival, but actually surpass, anything you've ever ordered out.
Forget soggy, greasy disappointments. We're talking about hot, fresh, and undeniably crunchy rings that boast an incredible flavor profile. This isn't just another recipe; it's a deep dive into the techniques, tips, and tricks—some straight from restaurant pros—that guarantee a superior result every single time. Get ready to impress your family and friends, because once you master this, homemade crispy onion rings will become your new go-to indulgence.
Why Homemade Onion Rings Are Always Better
The allure of a restaurant onion ring is strong, but often, the reality falls short. They can be overly greasy, the batter might slip off, or they arrive lukewarm. When you make them at home, you control every single variable, from the freshness of the onion to the quality of the oil and the precision of the seasoning. This allows for a level of freshness and customization that simply can't be matched.
- Unmatched Freshness: Served straight from the fryer, your homemade rings will be at peak crispness and warmth.
- Superior Ingredients: Choose the best onions and high-quality oil for a cleaner taste.
- Customizable Flavor: Adjust seasonings to your exact preference – more garlic powder, a hint of paprika, or even a dash of cayenne for a kick.
- Cost-Effective: Enjoy a generous batch of gourmet onion rings for a fraction of the cost of dining out.
- The Satisfaction Factor: There’s immense pride in presenting a dish made from scratch that truly wows.
Our onion rings recipe focuses on achieving that coveted tender-on-the-inside, crispy-on-the-outside perfection through a frying method. While baked versions exist, for that authentic, restaurant-quality crunch, frying is king. We'll guide you through the process, ensuring even beginners can deep-fry with confidence.
The Ultimate Crispy Onion Rings Recipe: Step-by-Step Guide
This recipe is designed to simplify the process while maximizing crispness and flavor. Gather your ingredients, and let's get started on your journey to homemade onion ring perfection.
Ingredients You'll Need:
- 1 large or 2 medium sweet onions (like Vidalia or yellow onions)
- 1 cup buttermilk (or 1 cup milk + 1 tablespoon white vinegar, let sit 5 minutes)
- 1 large egg
- 1 ½ cups all-purpose flour
- 1 teaspoon seasoned salt (or ½ tsp fine sea salt + ½ tsp your favorite seasoning blend like garlic powder/paprika)
- ½ teaspoon garlic powder
- ¼ teaspoon freshly ground black pepper
- Vegetable oil, canola oil, or peanut oil for frying (about 1 inch deep in your skillet)
- Paper towels for draining
Equipment:
- Deep skillet or Dutch oven
- Tongs or spider skimmer
- Wire rack set over a baking sheet (optional, for keeping warm)
- Thermometer (clip-on deep-fry thermometer is highly recommended)
Preparation Instructions:
1. Prepare the Onions
Start by slicing your onions. Remove the top and bottom ends, then peel away the outer skin. Lay the onion flat and slice it into approximately ¼-inch thick rings. Gently separate the rings. Thicker slices offer more tender onion, while thinner slices yield a crispier overall ring.
2. The Buttermilk Soak (or DIY Buttermilk)
In a medium-sized bowl, combine the buttermilk and the large egg. If you don't have buttermilk, simply pour 1 cup of regular milk into the bowl, add 1 tablespoon of white vinegar, stir, and let it sit for 5 minutes. The milk will curdle slightly, forming a quick buttermilk substitute. Whisk well to combine the egg and milk mixture until smooth. This liquid base will tenderize the onion slightly and provide the perfect sticky surface for the dry coating.
3. The Seasoned Flour Dredge
In a shallow dish (a pie plate or a wide, shallow bowl works perfectly), whisk together the all-purpose flour, seasoned salt, garlic powder, and black pepper. This seasoned flour is critical for flavor and creating that initial crispy layer.
4. The Double-Dredge for Maximum Crispness
This is where the magic happens for adhesion and texture. Take your separated onion rings and first, coat them lightly in the seasoned flour mixture. Ensure they are fully dusted, then shake off any excess. This initial flour layer is key; it helps the wet batter stick better, preventing it from sliding off during frying.
Next, dip the flour-coated onion rings into the buttermilk mixture, letting any excess liquid drip off. Finally, return them to the seasoned flour mixture for a second, thorough coating. Press the flour gently onto the rings to ensure full coverage. Place the coated rings onto a clean plate or baking sheet. Repeat this process until all your onion rings are beautifully coated.
5. The Freezing Secret to Perfect Batter Adhesion
This step is a game-changer and a secret many restaurants employ. Once all your onion rings are coated, place the plate or baking sheet into the freezer for 15-20 minutes. This brief chill time helps the batter set firmly onto the onion. When introduced to hot oil, this firm coating is far less likely to separate or fall off, guaranteeing a beautifully intact and crispy ring. To learn more about this crucial technique, check out The Secret to Super Crispy Onion Rings: Freeze for Perfection.
6. Frying for Golden Perfection
While your onion rings are chilling, add about 1 inch of your chosen frying oil (vegetable, canola, or peanut oil are excellent choices) to a deep skillet or Dutch oven. Heat the oil over medium heat until it reaches 350°F (175��C). Using a thermometer is highly recommended here; maintaining the correct temperature is vital for crispness and preventing greasy rings.
Once the oil is at temperature, carefully remove the onion rings from the freezer. Fry them in batches, being careful not to overcrowd the pan, which can drop the oil temperature and lead to soggy results. Fry for 1-2 minutes per side, or until they turn a beautiful golden brown and are deliciously crispy. Use tongs or a spider skimmer to carefully flip and remove them.
7. Drain and Serve Immediately
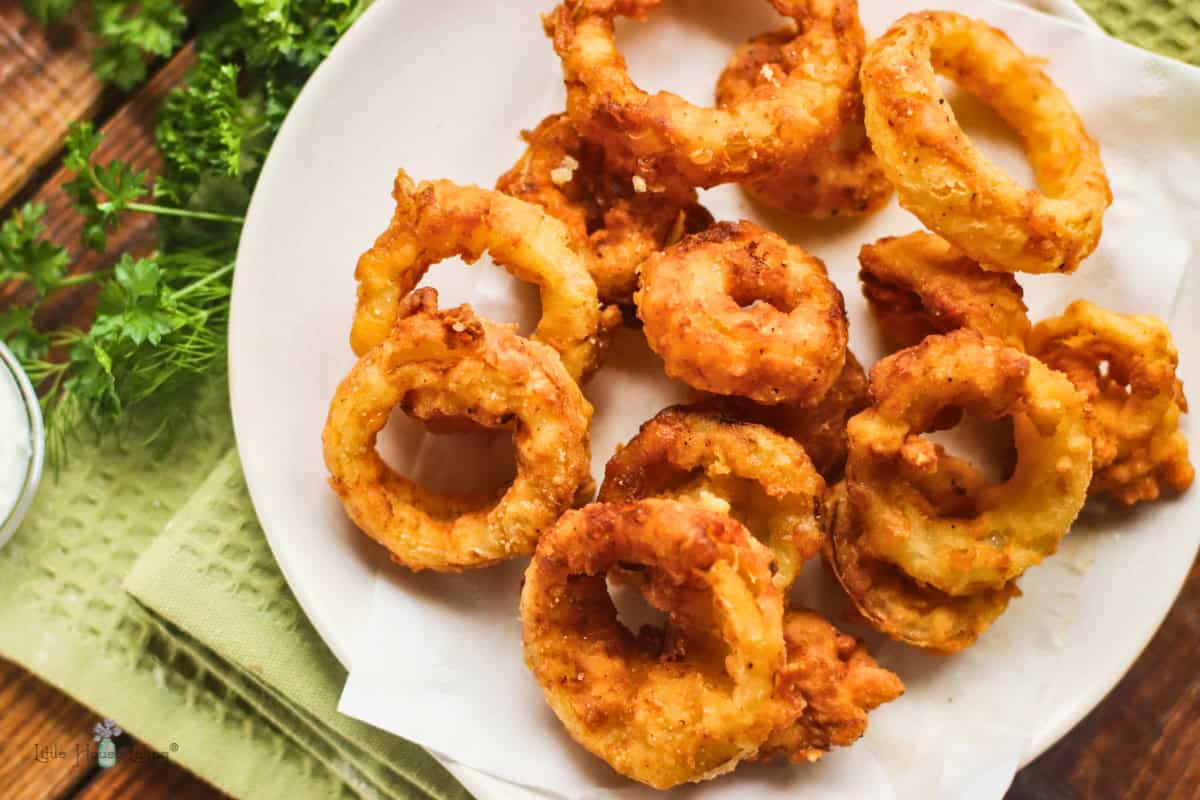
As you remove the cooked onion rings, immediately transfer them to a paper towel-lined plate to drain any excess oil. A sprinkle of additional seasoned salt or a pinch of flaky sea salt right after they come out of the fryer enhances their flavor. Serve them piping hot as a side dish for burgers, sandwiches, or as a fantastic appetizer with your favorite dipping sauces like spicy ranch, ketchup, or a tangy aioli.
Tips for Deep Frying at Home with Confidence
Deep frying can seem intimidating, but with a few safety precautions and tips, it’s entirely manageable:
- Use a Thermometer: This is non-negotiable for consistent results. Too low, and food gets greasy; too high, and it burns before cooking through.
- Don't Overcrowd: Fry in small batches to maintain oil temperature.
- Safety First: Never leave hot oil unattended. Keep a lid nearby to smother any potential oil fires. Have baking soda (not water!) handy for minor oil splatters.
- Oil Choice: High smoke point oils like vegetable, canola, or peanut oil are best for frying.
- Proper Drainage: Always drain fried foods on paper towels or a wire rack to ensure maximum crispness and remove excess grease.
- Oil Disposal: Allow oil to cool completely before straining and disposing of it properly.
Making Ahead & Freezing for Later
One of the fantastic benefits of this onion rings recipe is its make-ahead potential. You can prepare and freeze uncooked, coated onion rings for future cravings. Simply arrange the fully coated (but unfried) onion rings in a single layer on a baking sheet and freeze until solid (about 1-2 hours). Once frozen, transfer them to a freezer-safe bag or airtight container, separating layers with parchment paper to prevent sticking. They can be stored for up to 1-2 months. When ready to fry, simply take them straight from the freezer to the hot oil; no thawing necessary, though they may require an extra minute or two of frying time.
Conclusion
No longer do you need to dream of that perfect restaurant-quality onion ring; you can create them right in your own kitchen! This detailed onion rings recipe, complete with crucial tips like the double-dredge and the magical freezer chill, empowers you to craft crispy, flavorful, and truly unforgettable homemade onion rings. Whether you're serving them alongside a juicy burger, a classic hot dog, or simply enjoying them as a standalone snack, these crispy delights are guaranteed to be a hit. So, grab your apron, slice those onions, and prepare to embark on a delicious culinary adventure that will redefine your love for onion rings.
